
Alvin DIY
Welcome to the Alvin DIY site. This section of our website is intended for domestic users of our products in order to support you with handrail design and purchase for in and around the home.
The sections below are expandable for more detailed explanations where you see the ⓘ symbol, and we have included a jargon buster section at the bottom to cover terms that we use a lot on this site but you might not have heard before.
We hope this information proves of use and as always we are available on the phone, by email and live chat should you have a specific question.
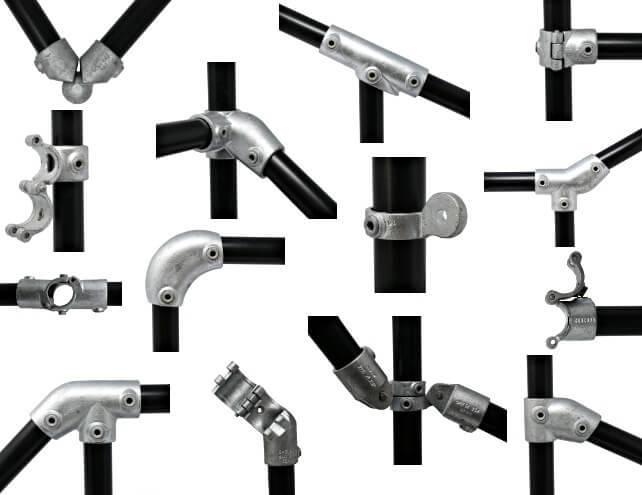
Introducing Alvin Quick Handrail Kits ⓘ
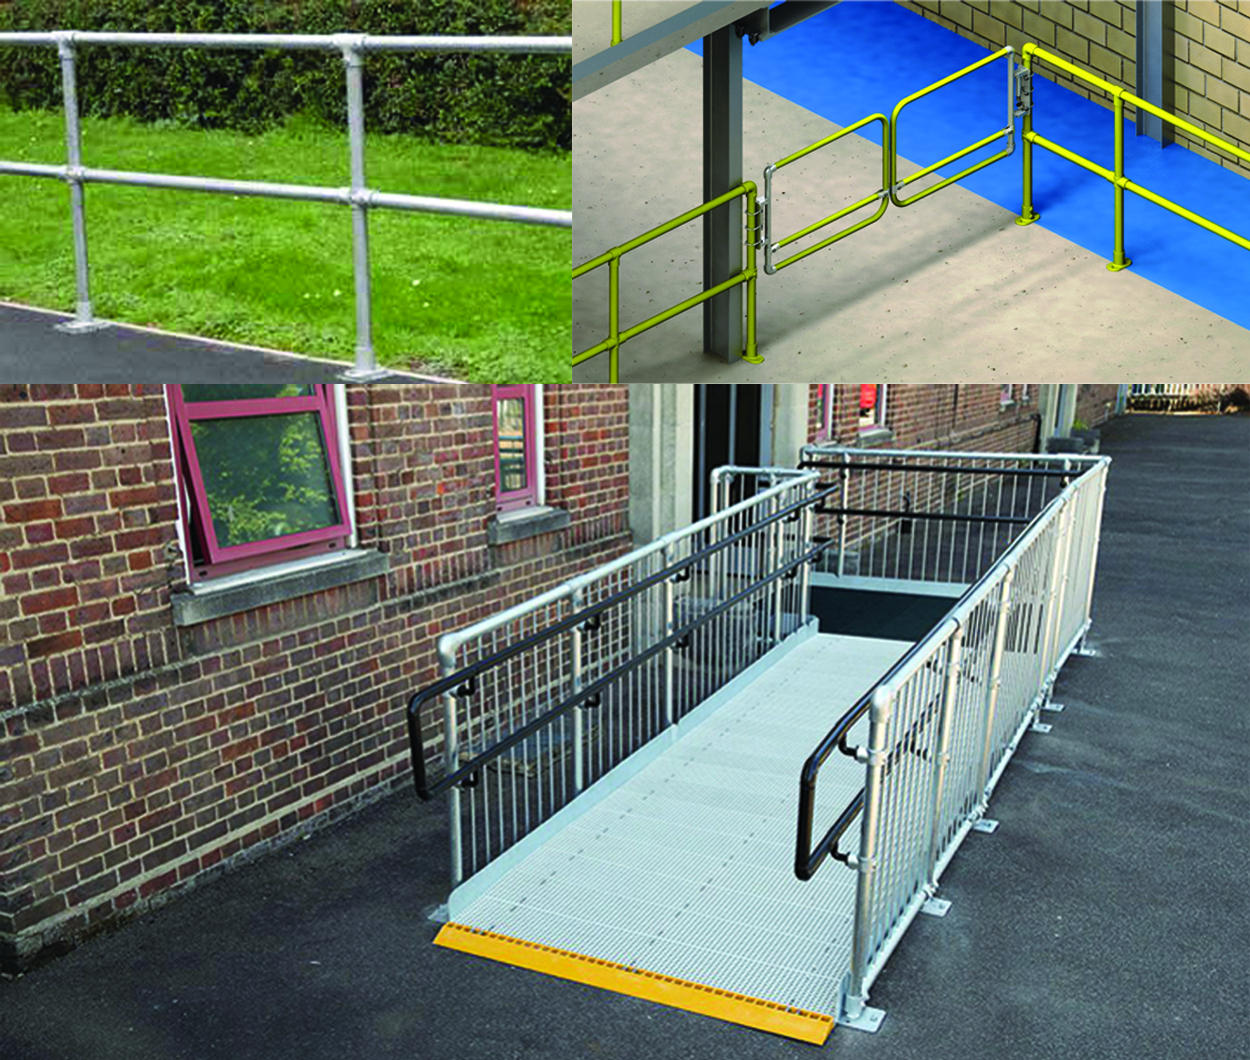
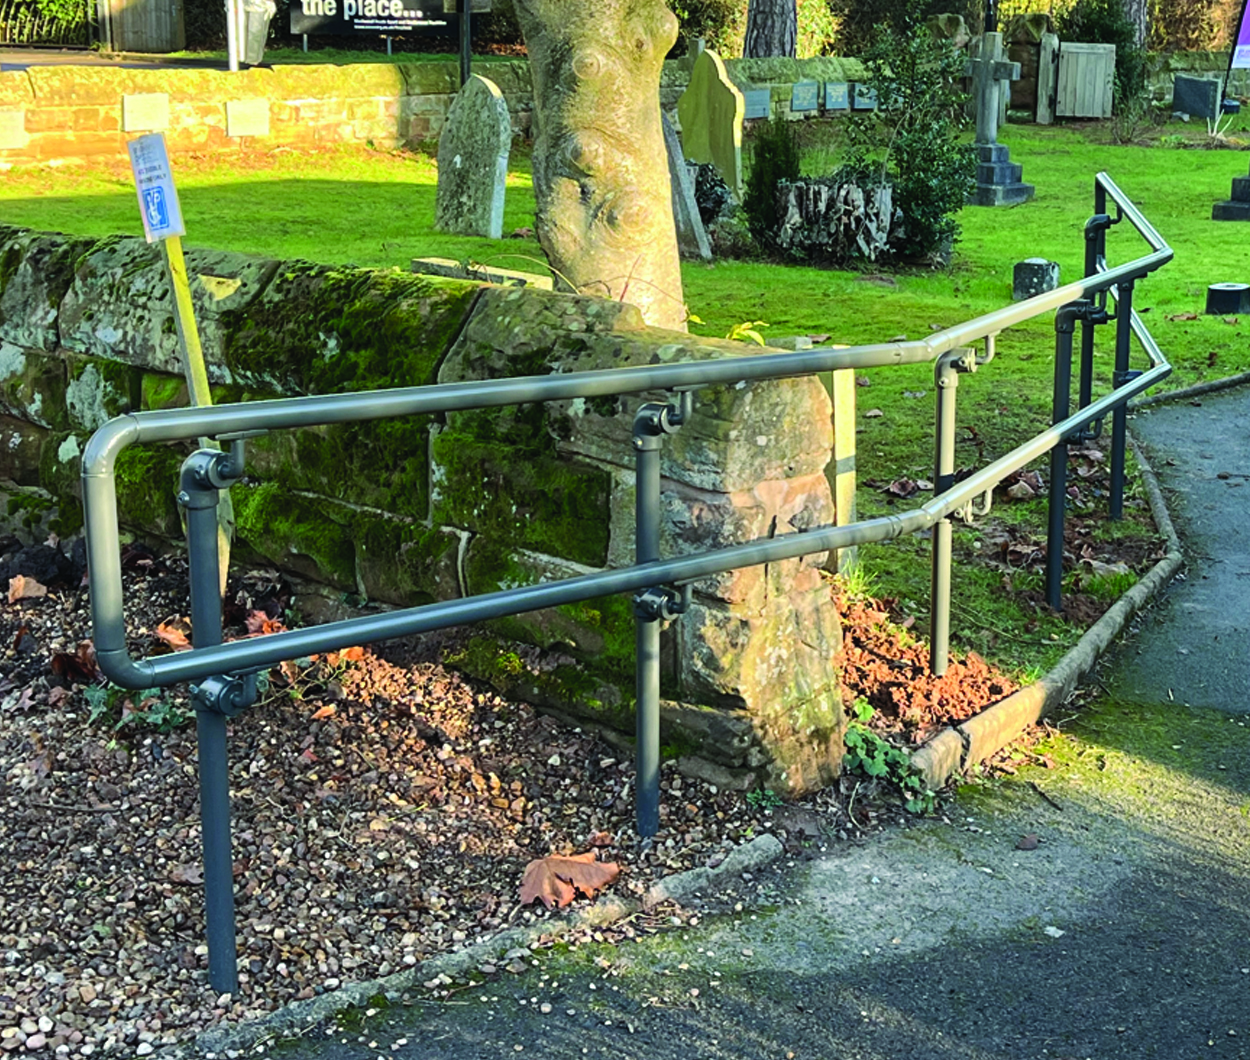
These kits are ideal for a handrail for access to and from a private house, the simple upright kits provide you with a pre-cut section of tube and the clamps needed to form the required junction with the horizontal handrail tubes, you can select from a range of corners, straight runs and inclines to deal with stairs or ramps. Once you have considered the design tips below, click here to go to the online shopping pages to purchase your Quick Handrail Kits
Step 1 - Things to consider when designing your handrail
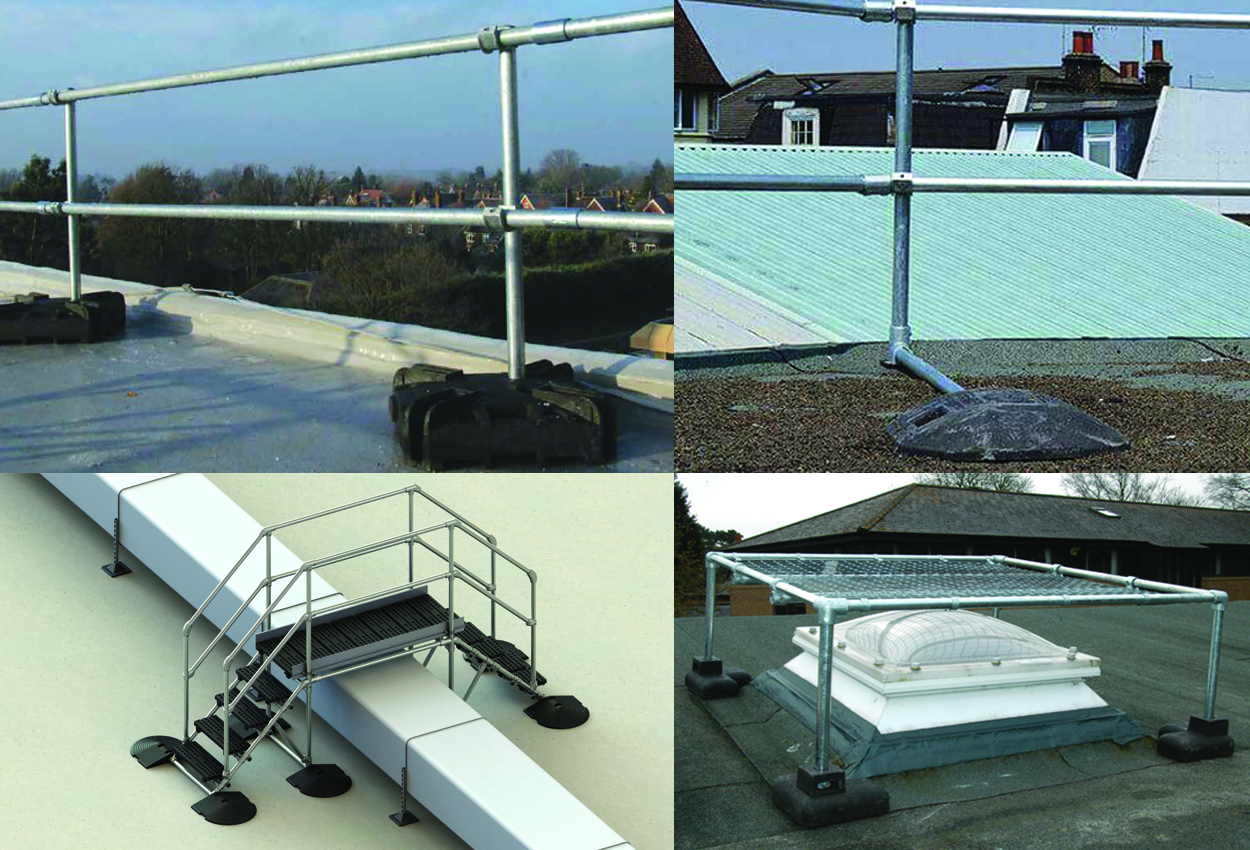
Fixing to the Floor
Without a solid fixing to the ground your handrail may become wobbly over time. Here are some tips to avoid this happening.
Don’t fix directly into tarmac or other soft surfaces.ⓘ
Dig out a 400mm x 400mm x 400mm cube and fill with concrete or post-fix mix. Either set the upright tube into the concrete or wait for it to fully cure and then drill and fix with bolts or chemical anchors
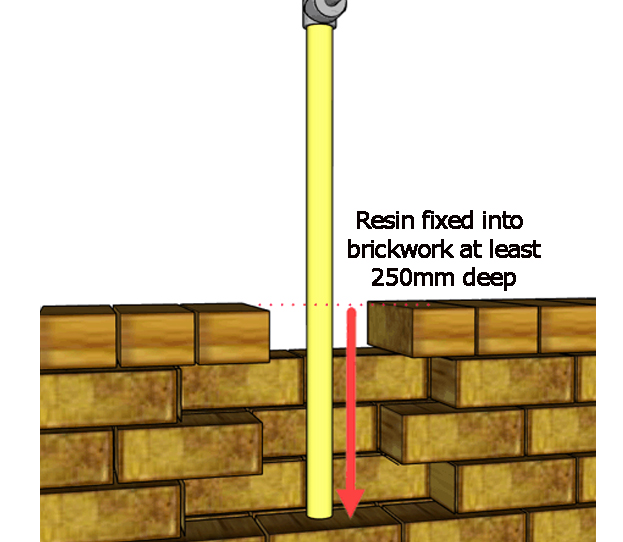
Don’t fix directly into paving slabs.ⓘ
Ideally use a core-drill to cut a hole slightly larger than the diameter of your upright to a depth of at least 250mm below the paving slab and use chemical anchor resin to fix it into the substrate. If the foundation of the paving is not concrete or similar then you should lift the slab and follow the advice above to form a 400mm cube of concrete, fixing the tube through the paving slab.
Don’t fix to the top row of bricks or the coping/capping brick on a wall. ⓘ
Ideally use a core-drill to cut a hole slightly larger than the diameter of your upright to a depth of at least 250mm below the paving slab and use chemical anchor resin to fix it into the substrate. If the foundation of the paving is not concrete or similar then you should lift the slab and follow the advice above to form a 400mm cube of concrete, fixing the tube through the paving slab.
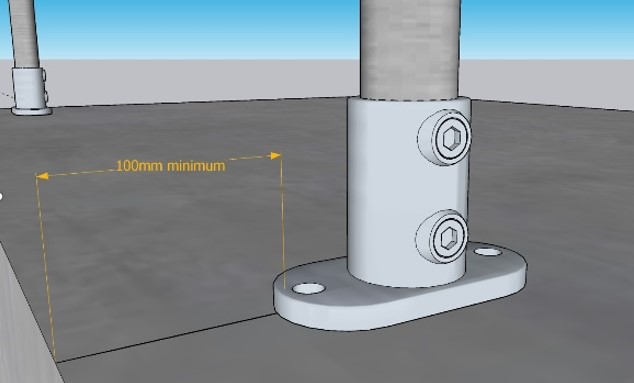
Don’t drill fixing holes closer than 100mm to the edge of the concrete ⓘ
Holes drilled closer than this risk popping the side off the concrete, particularly when using expansive bolts.
Choose an appropriate fixing type. ⓘ
Expansive bolts are often the simplest to use, however they are prone to working loose particularly in coarse concrete or softer material, take care not to make the fixing hole too wide.
Chemical anchors provide a better option for fixing into concrete because they do not put large sideways loads on the wall of the fixing hole like expansive bolts do. However chemical anchors can be harder to remove if the handrail needs to be taken down permanently, typically the fixings will need to be cut back to ground level.
Use galvanised fixings for external handrails, sometimes labelled HDG (hot-dip-galvanised) these fixings will resist corrosion for far longer than BZP (bright zinc plated) fixings.
Handrail Thickness
There are two main candidates to choose from:

Size 7 is easiest to grip.ⓘ
Size 7 tube is the favourite for handrails, it is a good balance of strength and usability, still large enough to offer a reasonable gap between uprights but still small enough that smaller or frail hands can get a good firm grip.
Size 8 is the strongest ⓘ
Size 8 is the same outer diameter as scaffolding tubes, it is stronger, meaning you might need fewer uprights, however it might be harder to get a firm grip, particularly for smaller children.How to space
How to space our your uprights
Generally, domestic handrails should be strong enough if you keep to the following maximum gaps, which are measured from the centre of one upright to the centre of the next.:
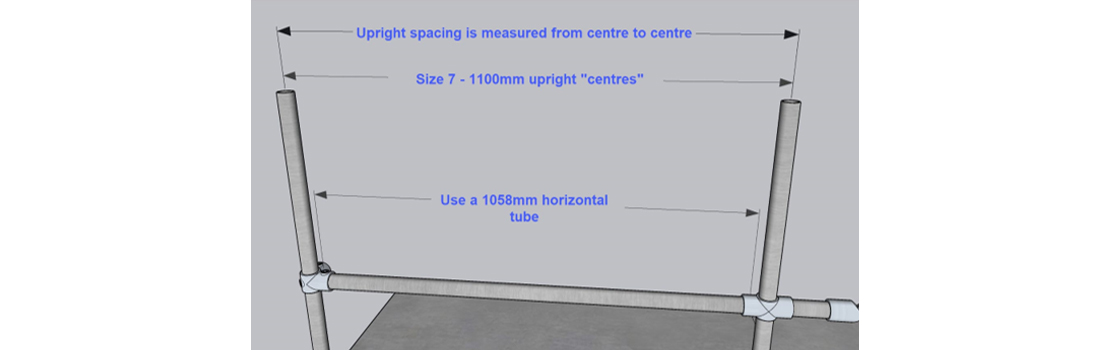
Size 7: 1100mm ⓘ
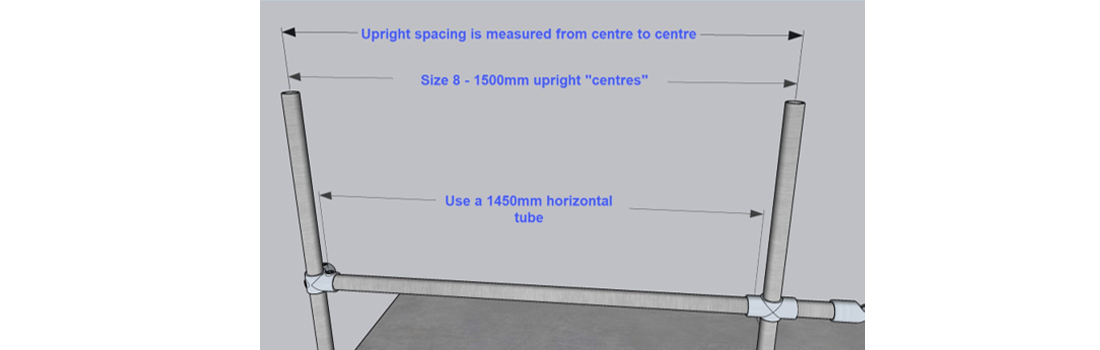
Size 8: 1500mm ⓘ
Gradient Changes
Ideally you should extend a handrail at least 300mm beyond the top and bottom of steps and ramps, so that the user can have a firm hold of the rail before they negotiate the gradient.
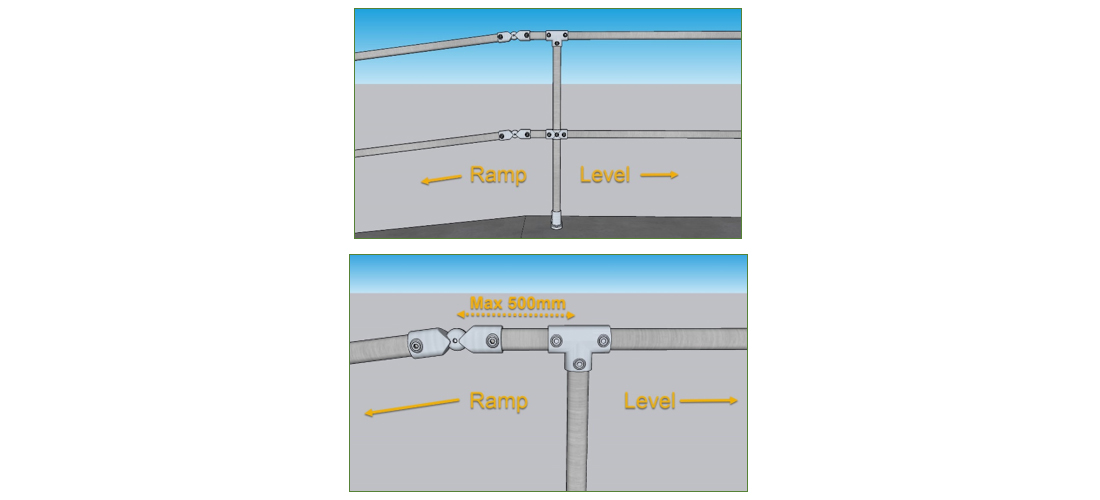
Gradient changes and corners should be offset by up to 500mm from the nearest upright ⓘ
Putting an upright just at the gradient change itself is often difficult due to the changing floor surface or the structure of the steps. The Alvin gradient change kits are useful here because they fit to the horizontal rails in-between uprights. A27 viable elbows form the join between the tubes and can be locked to suit any reasonable ramp or stair gradient up to 65 degrees incline.
The only firm rule is that they must be located within 500mm of an upright, which in turn means you can have your supporting uprights either side of the gradient change.
Calculating your gradient
Your choice of quick handrail kit will depend on the gradient of any steps or ramp you are fixing them to. ⓘ
It is not always possible to measure the angle of incline of a ramp or set of steps, but there is usually a way to calculate it using dimensions that are easier to measure in the real world. If you are uncomfortable with using the calculation methods we will be more than happy to help you over the phone, just call the office on 020 8254 2626.

Where and what to measure:
The diagram above shows the key dimensions that determine the gradient. First of all we need to introduce a term you may not have heard of. The diagonal purple line (labelled “c”) represents what we call the “pitch line” of a set of steps and we refer to this throughout the website. For ramps the pitch line is a line drawn along the walking surface from start to finish.
You will notice that the remaining purple lines form a right-angled triangle. This means we can use trigonometry to calculate the angle of incline (α) from any two other dimensions of the triangle. Dimension (a) is the change in height and dimension (b) is the length measured horizontally along the ground
The good news is that these days there are many trigonometry calculators freely available on the internet, so we need not concern ourselves with the underlying equations. A link to one of our favourite calculators is below:
Still Need Help?

Telephone
London: +44(0)20 8254 2626
Sheffield: +44(0)114 312 2250


Number: 020 8254 2626
or Click Logo to Chat

Click or scan the QR Code to start a WhatsApp chat with us